| Last updated on 29-Aug-2001 9:51 AM |  |
 |
UKIRT to GEMINI Conversion
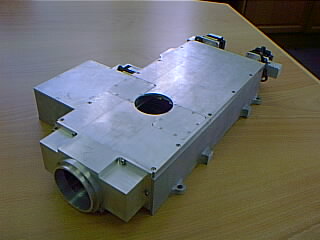
| 2 Cryostat Operations |
1 Introduction
This procedure goes on the assumption that the cryostat will have been removed from UKIRT as per section X of the manual and installed on the handling manipulator per section X.
The conversion requires a number of elements to be exchanged or added. These are:-
1. Within the cryostat exchange the fore optics module and the cold (Lyot) stop.
- modify the front cover of the Radiation Shield
- transfer of window to new vacuum cover
- exchanging front vacuum covers.
2. Externally the tasks required are:-
- conversion/transfer of the Calibration Unit modules including an exchange of light source assemblies
- transfer/modification of the Edict warm electronics
- addition of the support framework for the Gemini style Thermal Enclosures
- fitting of the Helium manifording system including purging of the two GM coldheads with N6 Helium
| Comments: | Done by: | |
| Checked by: |
Some of these warm tasks may be performed in the Gemini Dome.
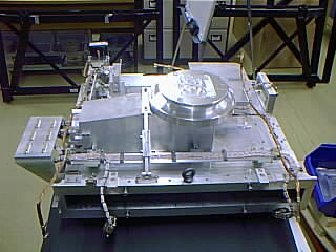
2 Cryostat Operations
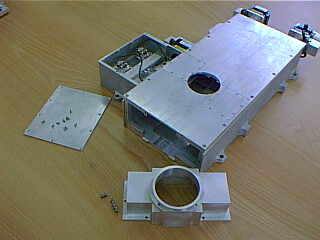
With the cryostat innards stable at room temperature remove the three elements of the calibration unit for conversion to Gemini mode. First ensure the calibration unit motors have been depowered at the control rack or have already been disconnected. Undo any cables to either the side assembly or the light source.
- Undo the five bolts retaining the slide assembly and remove. Next remove the light source assembly and finally the optics housing.
- The Calibration Unit can now be converted as per section X.
- Remove the window assembly, covering with the window cover and store in a suitable dry environment.
| Comments: | Done by: | |
| Checked by: |
Remove front cover - section X of disassembly, including removal of radiation shield
3. Exchange of Fore-Optics and Cold Stop
Although a final choice has not been made of the size of the cold stop to be used, it is likely that an exchange will be required. Whilst the fore-optics can easily be exchanged at this point, exchanging the cold stops does requie removal of the FOB.
- remove the Front Optical bench section X
- JM foreoptics
- Remove the filter assembly(JM)
- Remove the cold stop (JM)
- Replace filter assembly
- Fit Gemini fore-optics
- Refit front optical bench
- convert radiation shield.
Rotate the cryostat again until the front face of the front radiation shield is horizontal.
Lift the Gemini vacuum cover (~400 Kg) using slings along the sides and lower into place having first checked and cleaned the o-ring and mating surfaces. The four alignment pins, two on each side sill provide initial alignment.
With the cover held loosely on the slings, rotate the cryostat until the interface between cover and centre section is horizontal. Fit the two dowels at the base which position the front cover precisely with respect to the centre section. These are needed to give repeatable alignment of the instrument to Gemini.
Undo the three M6 fixing screws holding the UKIRT fore-optics module to the front optical bench and the four M5 fixing screws which attach each end of the link assembly to the front optical bench on either side of the fore-optics module, Remove the fore-optics with the links still attached and store in a safe place, This procedure should be done without removing the front optical bench from the instrument.
| Comments: | Done by: | |
| Checked by: |
Now secure the cover using the M12 bolt provided. Note that along the top edge shorter M12 x 40 1mg bolts are used whilst M12 x 45 bolts are used elsewhere, some without washers. Access on the side nearest the manipulator as awkward and all other bolts should be fitted first before removing the slings and rotating the cryostat by 90 degrees to get at the remaining bolts from the side.
| Comments: | Done by: | |
| Checked by: |
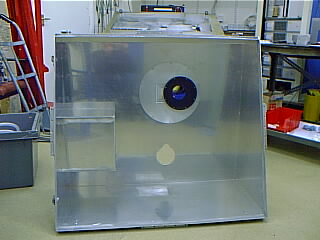
![]() The
window assembly can now be fitted but probably should be held until the
cryostat can be evacuated shortly afterwards to minimise exposure of the
window innards to potential moist air.
The
window assembly can now be fitted but probably should be held until the
cryostat can be evacuated shortly afterwards to minimise exposure of the
window innards to potential moist air.
With the window fitted and the cover removed, the Calibration optics, as modifies at X, can be fitted. Rotate the cryostat to get the front face at about 10 degrees back from the vertical and with the coolers on the bottom, fit the optics housing (Offner relay system) first. pushing against the single stop on the left hand side and the two stops along the base. Secure with the four M6 fixings and tighten to torque of x Nm.
| Comments: | Done by: | |
| Checked by: |
Finally fit the Gemini specific flux collector optics, the three alignment pads being inbuilt into the optics housing.
Connect up the motor cables at right and the arc lamp cables at left from the feed through connectors in the side walls.
| Comments: | Done by: | |
| Checked by: |
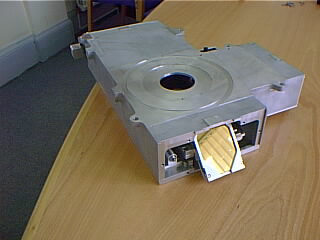
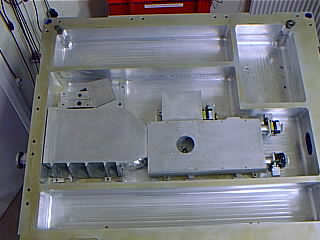
Front Optical bench with UKIRT fore-optics fitted
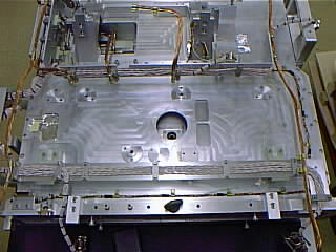
Mounting points for UKIRT fore-optics
At the top left hand side and bottom centre fixing points for the fore-optics module (as viewed in the above photo) change over the M6 mounting pad with its adjacent blank plate.
| Comments: | Done by: | |
| Checked by: |
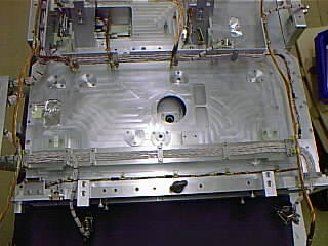
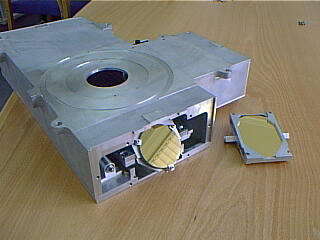
Mounting points for GEMINI fore-optics
Position the GEMINI fore-optics module onto its mounting pads with the links in position, ensure that it is sitting properly and that it is located hard up against the single position defining pad on the left and two position defining pads at the bottom of the module (as viewed in the above photo), using the three M6 fixing screws secure the module to the front optical bench and attach the links to the same points using the four M6 fixing screws.
| Comments: | Done by: | |
| Checked by: |
Front optical bench with GEMINI fore-optics fitted
4 Converting the Radiation Shield

Undo the eight M4 fixing screws on the inside and remove the ice collector ring and baffle components from the front circular insert plate of the radiation shield.
| Comments: | Done by: | |
| Checked by: |
Undo the ten M4 fixing screws holding the front circular insert plate to the radiation shield, rotate the plate through 180 degrees and reassemble.
| Comments: | Done by: | |
| Checked by: |
fit the GEMINI ice collector ring to the front of the radiation shield from the outside using eight M4 countersink fixing screws after the radiation shield has been refitted to the instrument.
| Comments: | Done by: | |
| Checked by: |
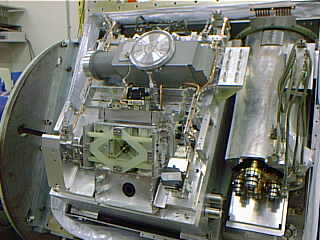
5 Converting the Calibration Unit
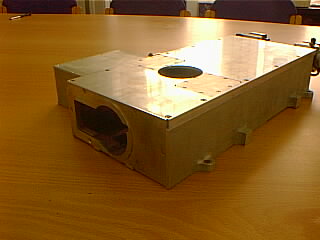
Calibration unit mechanism housing in UKIRT configuration
Undo the six M4 fixing screws and remove the end cover from the calibration unit mechanism housing.
| Comments: | Done by: | |
| Checked by: |
Turn the mechanism housing over and ensure that the window shutter is open, Manualy drive the mirror slide to the second waveplate position where the UKIRT folding flat mirror will be visible through the opening at the end of the housing, Undo the two M4 fixing screws on either side of the mirror mount and carefully remove the mirror assembly from the housing and store in a safe place, Fit the smaller GEMINI folding flat mirror assembly in the same position ensuring that it is sitting properly and located against the two defining edges, Reverse the mirror slide to the safe clear position.
| Comments: | Done by: | |
| Checked by: |
Fit the GEMINI endplate to the mechanism housing using five M4 countersunk screws.
| Comments: | Done by: | |
| Checked by: |
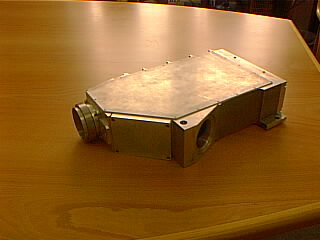
Calibration unit offner relay optics housing in UKIRT configuration
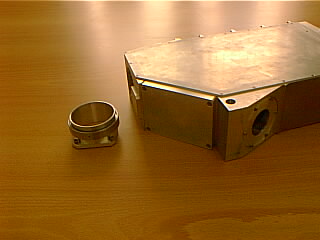
Undo four M4 fixing srews and remove the threaded tube and locknut from the end of the offner relay optics housing.
| Comments: | Done by: | |
| Checked by: |
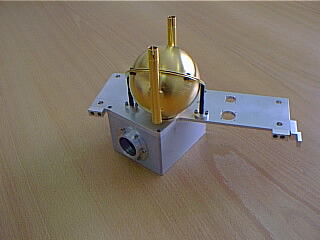
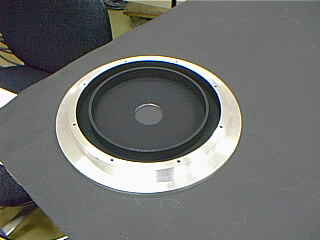
GEMINI flux collector optics housing and integration sphere
GEMINI calibration unit fitted to front vacuum cover